How to Grow Sweet Potatoes: A Guide to Backyard Abundance
Calendula's Garden is reader suported This post may contain affiliate links, more on our Disclaimer page. Thank you!
There is a specific kind of joy when you dig into the soil and pull out a bright, earthy treasure that you grew yourself. Sweet potatoes are perhaps one of the most rewarding crops to experience this with.
They are resilient, heat-loving, and offer a nutritional payout that few other vegetables can match. If you have been looking for a way to maximize your garden’s output while minimizing the fuss, you have found your match.
Sweet potatoes (Ipomoea batatas) are often confused with regular white potatoes, but they are entirely different plants with different needs. While regular potatoes thrive in the cool weather of spring, sweet potatoes are tropical vines that crave the summer heat. This makes them an excellent crop to plant after your spring greens have bolted.
For beginner gardeners, sweet potatoes are a forgiving teacher. They don’t require perfect soil. In fact, they often prefer soil that isn’t too rich. They suffer from fewer pests than many other common garden vegetables, and their lush, trailing vines act as a beautiful “living mulch,” shading the soil and suppressing weeds.
Whether you have a sprawling backyard plot or just a sunny patio for a few containers, cultivating these tubers is a journey toward sustainability and self-sufficiency that your whole family can enjoy.
Plant Characteristics
Before we get our hands dirty, let’s look at the basic requirements for these sun-loving plants.
| Feature | Details |
| Scientific Name | Ipomoea batatas |
| Plant Family | Convolvulaceae (Morning Glory Family) |
| Hardiness Zones | 9–11 (perennial); grown as an annual in zones 3–8 |
| Sun Exposure | Full Sun (at least 6–8 hours) |
| Soil Type | Well-draining, sandy loam |
| Soil pH | Slightly acidic (5.8 to 6.2) |
| Time to Harvest | 90 to 120 days, depending on variety |
| Water Needs | Moderate; consistent moisture is best |
The Natural History of Sweet Potatoes
To understand how to grow sweet potatoes, it helps to understand where they come from. Unlike the white potato (Solanum tuberosum), which belongs to the nightshade family and hails from the cool Andes mountains, the sweet potato is a member of the morning glory family. If you let your vines flower, you will see the resemblance immediately. Their trumpet-shaped blooms look lovely in the garden.
Native to the tropical regions of the Americas, likely Central or South America, sweet potatoes have been cultivated for thousands of years. They were introduced to Europe by Christopher Columbus and eventually made their way to Asia and Africa, where they became a staple food source due to their hardiness and high calorie count.
Because of this tropical heritage, sweet potatoes have zero tolerance for frost. They love heat. The warmer your summer, the happier your harvest will be. This natural history is why we plant them well after the danger of frost has passed and the soil has thoroughly warmed up.
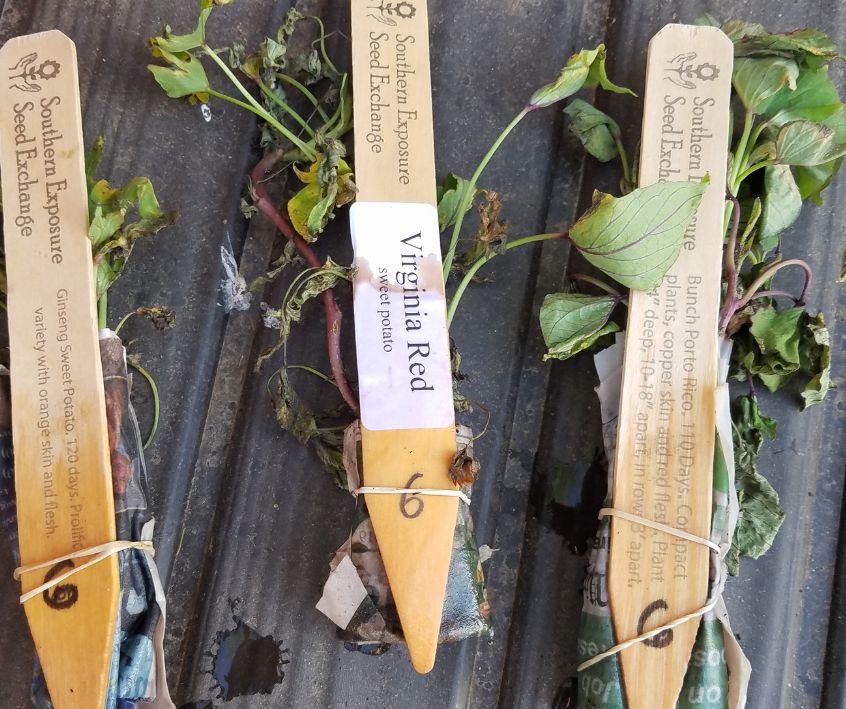
Choosing Your Varieties
While the grocery store usually offers just one or two types of sweet potatoes, the home gardener has access to a rainbow of options. Choosing the right variety can depend on your growing season length and your kitchen preferences.
Beauregard
This is the standard for commercial sweet potatoes and likely what you see in the supermarket. It has rose-colored skin and deep orange flesh. It is reliable, high-yielding, and relatively fast to mature (about 90 days), making it a great choice for northern gardeners with shorter summers.
Jewel
Often called the “Queen of Sweet Potatoes,” Jewel has copper skin and deep orange flesh. It is known for its excellent flavor and disease resistance. It takes a little longer to mature than Beauregard (about 100 days).
Georgia Jet
If you live in a colder climate, this is a variety you should know. It is exceptionally fast-maturing (sometimes ready in just 90 days) and has a classic reddish skin with orange flesh.
Japanese (Murasaki)
These have reddish-purple skin and dry, white flesh that turns creamy and incredibly sweet when roasted. They have a nutty flavor, almost like a chestnut. They are a favorite among gourmet cooks but can take a bit longer to grow (100–120 days).
Purple (Stokes or Okinawan)
For a boost of antioxidants, purple sweet potatoes are stunning. They have dark purple skin and vibrant purple flesh. They tend to be denser and less sweet than orange varieties, but are delicious when baked. Note that some purple varieties require a long, hot growing season (120+ days).
Where to find seeds, plants, and supplies:
Sprouting Slips: The Start of Your Garden
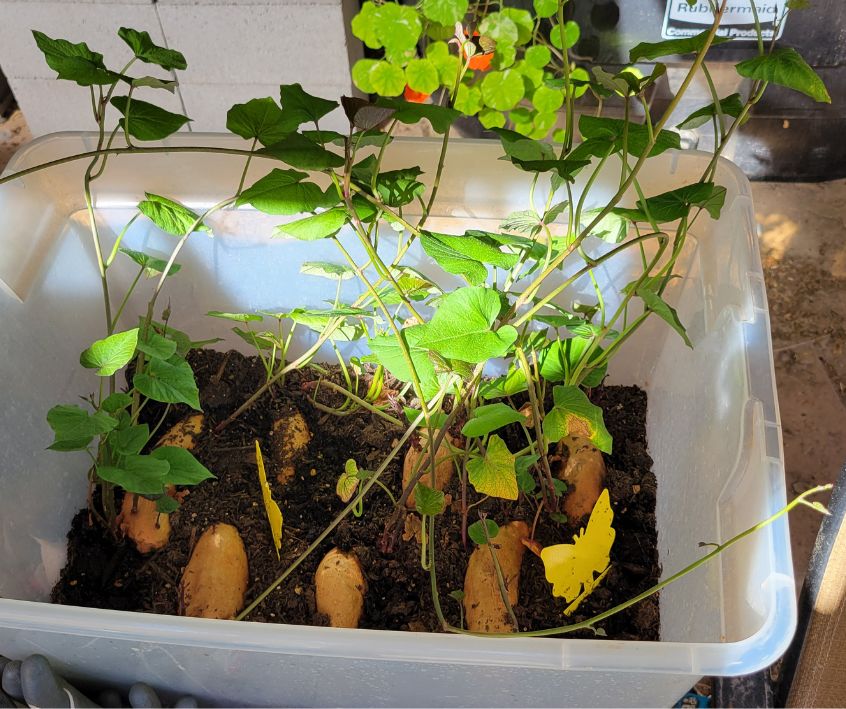
Here is where sweet potatoes differ most from regular potatoes. You don’t plant chunks of the potato itself. Instead, you plant “slips.”
A slip is a green shoot that grows out of a mature sweet potato. When you detach this shoot and plant it, it grows roots and eventually forms new tubers.
You can buy slips online, but making your own is a fun, money-saving project that is perfect for getting kids involved in the garden. There are two main ways to do this.
A. The Water Method
This is the classic science-class experiment. It is visual and easy to track.
- Select your potato: Choose a healthy, organic sweet potato. Organic is crucial here because conventional potatoes are often sprayed with sprout inhibitors that stop them from growing.
- Prep the jar: Wash the potato well. Insert three or four toothpicks around the middle of the potato.
- Suspend it: Balance the potato on the rim of a jar or glass filled with water so that the bottom half is submerged and the top half is exposed to air.
- Wait for magic: Place the jar in a warm, sunny windowsill. Change the water every few days to keep it fresh.
- Harvest slips: In a few weeks, you will see roots forming in the water and green sprouts (slips) emerging from the top. Once the slips are about 6 inches long, gently twist or cut them off the potato.
- Root the slips: Place the bottom inch of these detached slips into a fresh glass of water. Within a few days, they will grow their own white roots. Once the roots are an inch long, they are ready to plant.
B. The Soil Method
This method is often faster and less prone to rotting if you need to produce a large number of slips.
- Prepare the tray: Fill a seed tray or a shallow container (with drainage holes) with moist potting soil or seed-starting mix.
- Prep the potato: Lay your organic sweet potato on its side in the soil. You can bury it halfway, leaving the top exposed. Some gardeners prefer to cut the potato in half lengthwise and place the cut side down.
- Add heat: Sweet potatoes sprout best in warmth. Placing the tray on a seedling heat mat set to around 75°F to 80°F (24°C–27°C) will speed up the process significantly. If you don’t have a heat mat, the top of the fridge often provides a nice warm spot.
- Keep moist: Keep the soil consistently damp but not soggy.
- Harvest: Shoots will emerge from the soil in a few weeks. Once they are 6 to 8 inches tall, cut them off at soil level. You can plant these directly or root them in water for a few days first.
Finding Seed Potatoes
If you don’t have any sweet potatoes left over from last year’s harvest, where should you get your starter potato?
Your best option is to purchase certified “seed potatoes” or slips from a reputable nursery or seed company. These are certified disease-free. Sweet potatoes can carry viral diseases that reduce yields, so starting with clean stock is a smart investment for a healthy garden.
Can you use a grocery store potato? Yes, but with a caveat. As mentioned, conventional grocery store potatoes are treated to prevent sprouting. If you want to sprout store-bought potatoes, always head to the organic produce section.
Look for firm tubers without blemishes or soft spots. This is a great way to reduce waste and grow your own food from scraps!
When to Transplant Outside
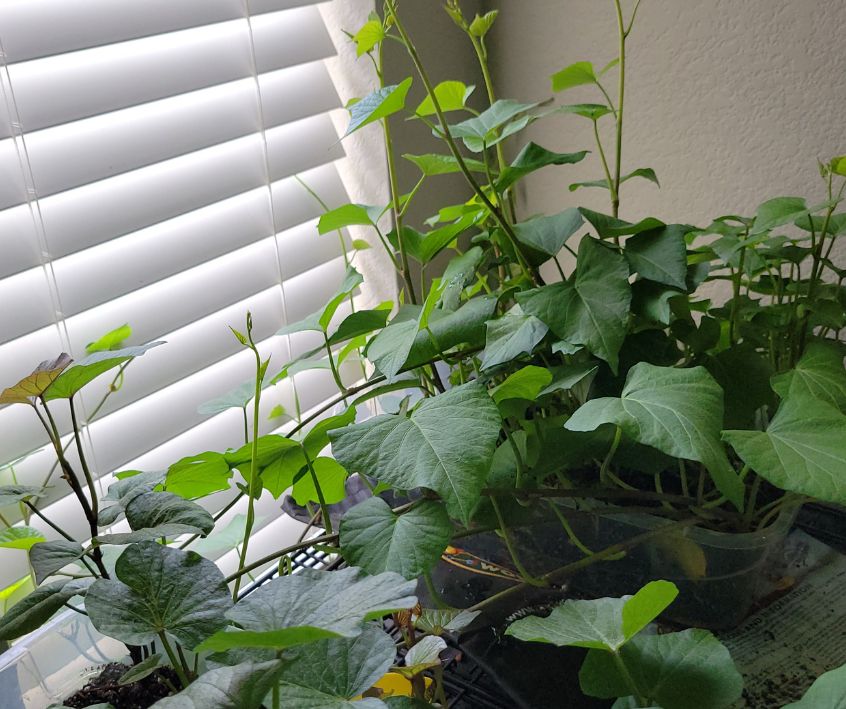
Patience is your best tool here. Do not rush to get sweet potatoes in the ground. Unlike kale or peas, sweet potatoes will not grow in cold soil; in fact, cold soil can stunt them permanently.
Wait until at least three to four weeks after your last frost date. You want the soil temperature to be at least 65°F (18°C). If the nights are still dipping below 55°F (13°C), wait a little longer.
Hardening Off
Just like any seedling started indoors, your slips need to get used to the sun and wind. Over the course of a week, place your rooted slips outside in a sheltered, shady spot for a few hours, gradually increasing their time and sun exposure each day.
Planting Your Slips
- Prepare the bed: Sweet potatoes love loose, well-draining soil. If your soil is heavy clay, mix in plenty of compost or consider planting in raised beds (or mounds). They struggle to form nice tubers in compacted earth.
- Spacing: Plant your slips 12 to 18 inches apart, in rows spaced 3 feet apart. Give them room to ramble!
- Bury deep: Dig a hole deep enough to bury the slip up to its top leaves. You want to bury several of the nodes (the bumps where leaves grow) because this is where the tubers will form.
- Water well: Give them a good drink immediately after planting to settle the soil around the roots.
Watering and Fertilizing
Sweet potatoes are surprisingly drought-tolerant once established, but they need help getting there.
Watering
For the first two weeks after transplanting, water daily to help the slips establish their root systems. Once they perk up and start growing, you can reduce watering. They generally need about 1 inch of water per week.
Consistent watering helps prevent the tubers from splitting. Stop watering completely about three weeks before your planned harvest to prevent the tubers from rotting and to help toughen up the skins.
Fertilizing
Be careful with fertilizer. Sweet potatoes are light feeders. If you give them too much nitrogen (the first number in the N-P-K ratio), you will get an incredible display of lush green vines but very few, spindly potatoes.
The best approach is to amend your soil with good quality compost before planting. Compost provides a balanced, slow-release source of nutrients and improves soil structure. If you feel you must fertilize, choose a balanced organic option or one slightly higher in phosphorus and potassium to encourage root growth.
Growing in Containers
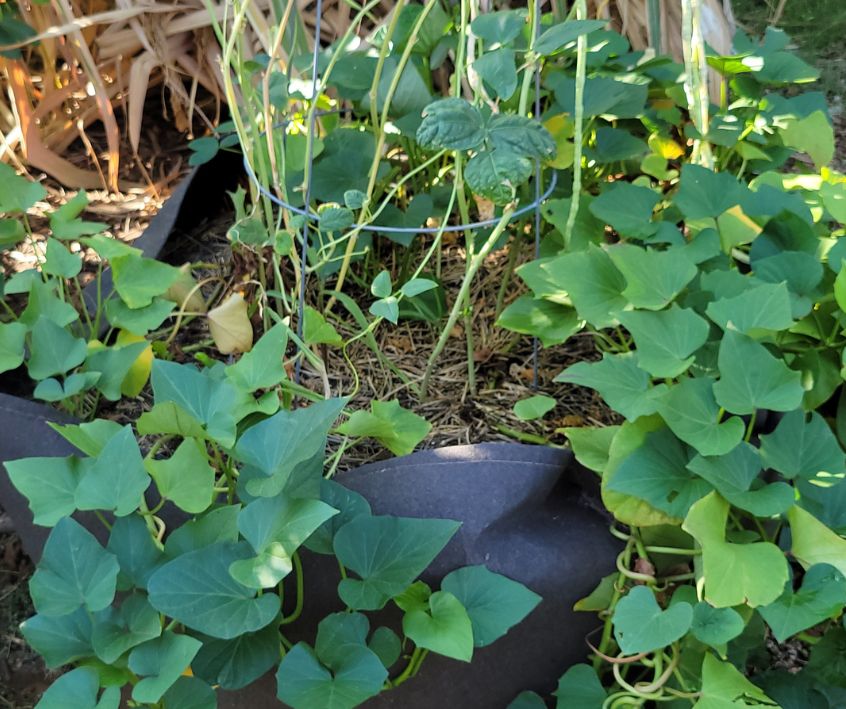
Short on space? No problem. Sweet potatoes grow beautifully in containers. In fact, container growing can make harvesting much easier. You just dump the pot out!
- Choose the right pot: You need a container that holds at least 15 to 20 gallons of soil. Fabric grow bags are fantastic for this because they drain well and allow air to reach the roots, preventing rot.
- Soil mix: Use a high-quality potting mix mixed with some compost. Do not use garden soil in pots, as it compacts too easily.
- Drainage is key: Ensure your pot has drainage holes. Sweet potatoes hate “wet feet.”
- Sun: Place your container in the sunniest spot you have. The soil in pots warms up faster than the ground, which sweet potatoes love, but it also dries out faster, so check your moisture levels daily during the height of summer.
Sweet Potatoes as a Living Mulch Solution
Sweet potatoes are not only delicious and packed with nutrients, but they can also serve as a living mulch in your garden.
As they grow and spread, their large leaves provide shade and help suppress weed growth. They also send out roots that break up compacted soil and add organic matter to the ground.
To use sweet potatoes as a living mulch, follow these steps:
- Choose an area of your garden that needs some extra love – perhaps it has poor soil or is prone to weeds.
- Plant sweet potato slips (young plants) about 12 inches apart in rows.
- As the vines grow, train them to cover the ground between the rows instead of growing vertically.
When to Harvest
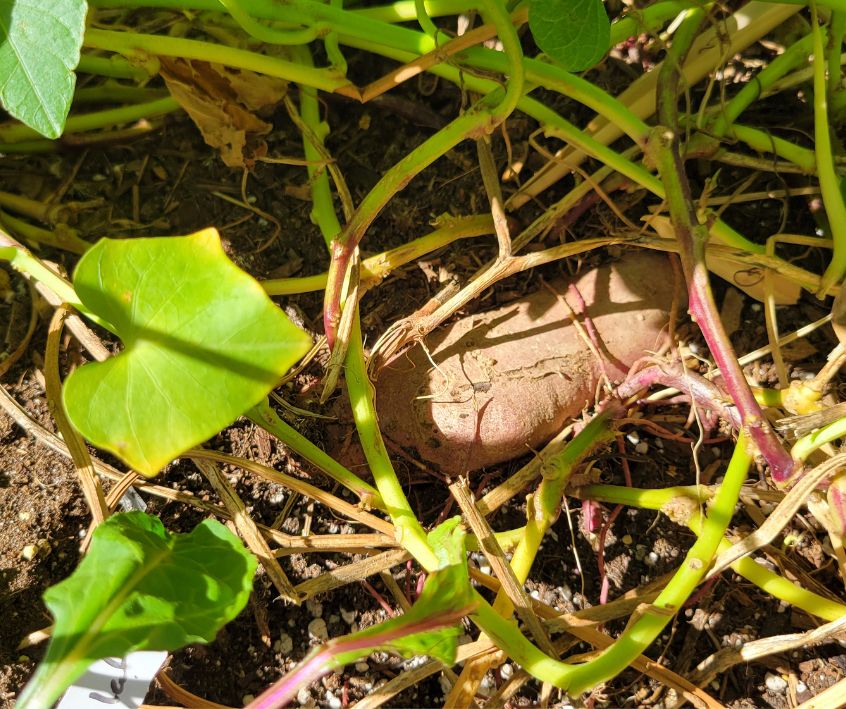
The anticipation of harvest time is thrilling, but how do you know when they are ready?
Most varieties are ready to harvest between 90 and 120 days after planting. The leaves might start to yellow slightly as the weather cools, which is a good sign.
However, the most critical rule is: Harvest before the first frost. Frost will kill the vines and can damage the tubers underground, causing them to rot quickly in storage.
The Harvesting Process:
- Cut the vines: A few days before you dig, cut the vines off at the soil level. This tells the plant to stop putting energy into leaves and start thickening the skin of the potatoes.
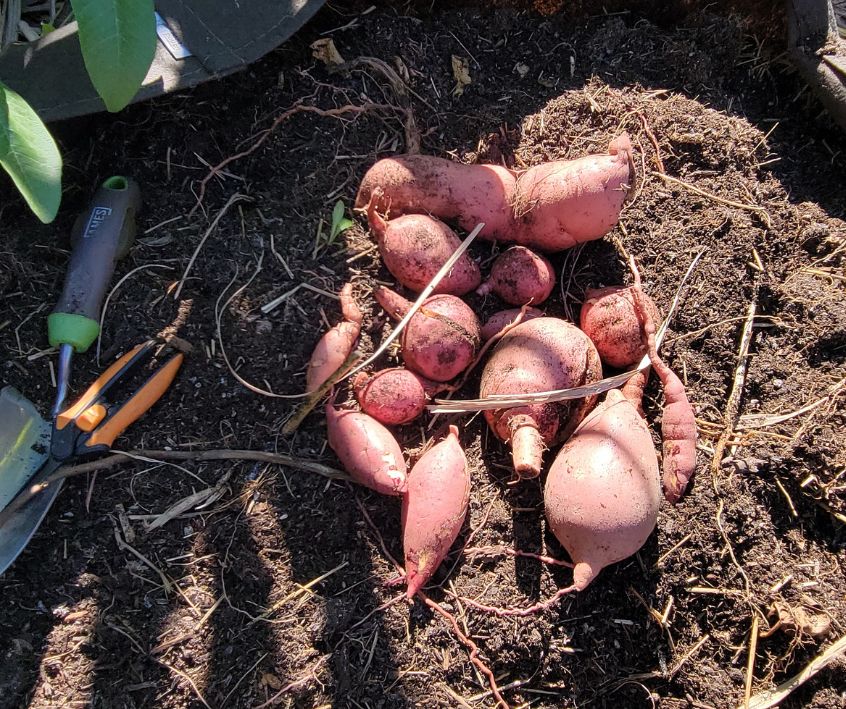
- Dig gently: Use a garden fork rather than a shovel if possible. Start digging about 18 inches away from the main stem to avoid slicing into your prize potatoes. Loosen the soil and gently lift the tubers out by hand. Sweet potato skin is very delicate at this stage and scratches easily.
- Do not wash them: Resist the urge to scrub the dirt off. Moisture encourages rot. Just brush off large clumps of soil.
The Secret Step: Curing
You might be tempted to cook one right away, but fresh sweet potatoes are surprisingly starchy and not very sweet. To get that sugary flavor and to ensure they store through the winter, you must “cure” them.
Curing heals any scratches on the skin and converts starches into sugars. To cure, place your unwashed potatoes in a warm, humid spot (ideally 80°F to 90°F with high humidity) for about 10 to 14 days.
A small closet with a space heater or simply placing them in paper bags in the warmest room of your house can work. After curing, store them in a cool, dry, dark place (around 55°F to 60°F). Properly cured sweet potatoes can last for six months or more!
Enjoying Your Homegrown Sweet Potatoes
Growing sweet potatoes is an exercise in patience and trust. You spend months tending to vines without seeing the fruit of your labor, trusting that beneath the soil, something wonderful is happening. And then, on a crisp autumn day, you uncover a bounty that can feed your family for months.
From roasting them simply with olive oil to baking them into pies, the versatility of this crop is unmatched. By growing your own, you are not just getting food; you are reconnecting with the seasons, reducing your carbon footprint, and building a little more resilience right in your own backyard. So grab a potato, start sprouting, and get ready for your sweetest harvest yet.
Visit the Garden Resources page for supplies and inspiration. Don’t forget to subscribe to the Calendula’s Garden Newsletter for more gardening tips.
Calendula’s Garden is reader supported. When you buy through links on our site, we may earn an affiliate commission. As an Amazon Associate, I earn from qualifying purchases. For more information, view our Disclaimer page. Thank you!