Harvest Inspired Christmas Dishes Everyone Will Love
Calendula's Garden is reader suported This post may contain affiliate links, more on our Disclaimer page. Thank you!
Christmas dinner doesn’t have to derail your healthy eating goals. While traditional holiday meals often center around rich, heavy dishes, there’s something magical about creating festive food recipes that celebrate both the season and your garden’s bounty.
Fresh herbs still thriving in your winter garden, stored root vegetables from your autumn harvest, and preserved fruits can transform your holiday table into a showcase of nutritious, delicious Christmas food ideas.
The beauty of garden-to-table holiday cooking lies in its simplicity and flavor intensity. When you use ingredients you’ve grown yourself, every bite carries the satisfaction of your hard work alongside exceptional taste.
Your guests will notice the difference. Vegetables picked at peak ripeness and herbs snipped just before cooking deliver vibrant flavors that store-bought alternatives simply can’t match.
This approach to holiday cooking also connects us to generations past, when families relied heavily on their preserved harvests to create memorable Christmas feasts.
By incorporating your garden’s gifts into your holiday menu, you’re not just serving yummy food. You’re creating a meaningful celebration that honors both tradition and wellness.
Why Garden Fresh Ingredients Make Christmas Food Extra Special
Using vegetables and herbs from your own garden during the holidays offers benefits that extend far beyond basic nutrition.
Fresh garden produce contains higher levels of vitamins and antioxidants compared to vegetables that have traveled long distances or sat in storage for weeks.
Peace Health- Eating from the garden: The health benefits of seasonal produce
Your homegrown carrots, Brussels sprouts, and winter squash retain peak nutritional density when harvested close to serving time.
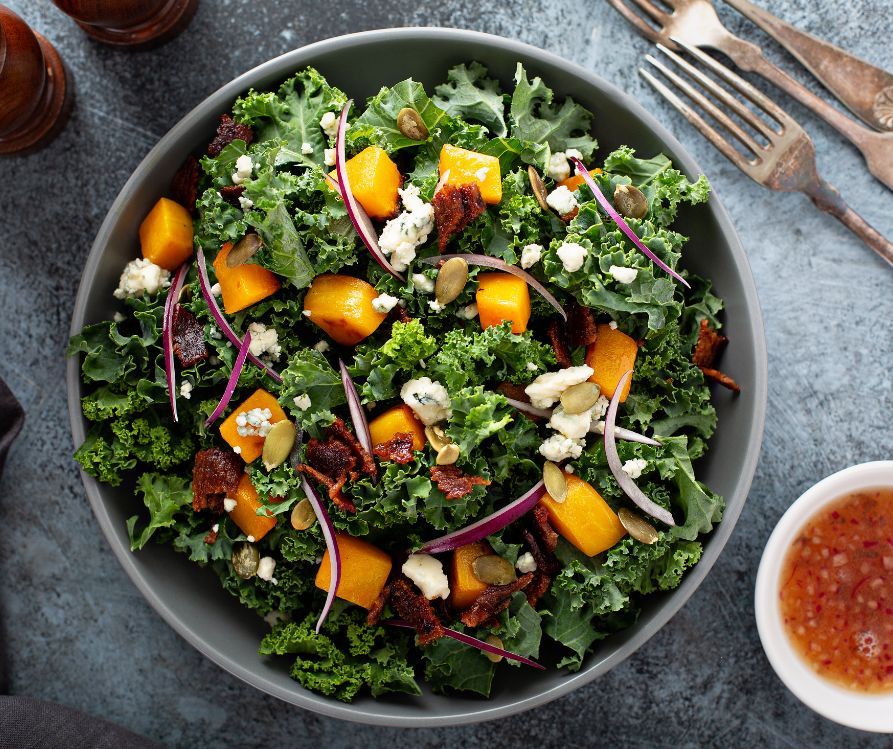
Garden vegetables also provide unmatched flavor complexity. That rosemary you’ve been nurturing all season carries essential oils and aromatic compounds at their strongest concentration.
Your storage onions have developed their full sugar content through proper curing. These subtle but significant differences elevate simple food recipes into memorable dining experiences.
Don’t forget your summer harvest of tomatoes and zucchini noodles you tucked away in the freezer. Produce that has been picked and frozen in peak condition retains flavor and nutritional content.
Beyond nutrition and taste, cooking with your harvest creates a deeper connection to your meals. There’s profound satisfaction in serving Brussels sprouts you planted as seedlings or herbs you’ve tended through changing seasons.
This connection often inspires more mindful eating habits and greater appreciation for the food on your plate.
Garden cooking also supports sustainable living practices. By reducing reliance on transported produce, you’re minimizing your holiday meal’s environmental impact while maximizing its nutritional and emotional value.
Garden Fresh Appetizers to Start Your Feast
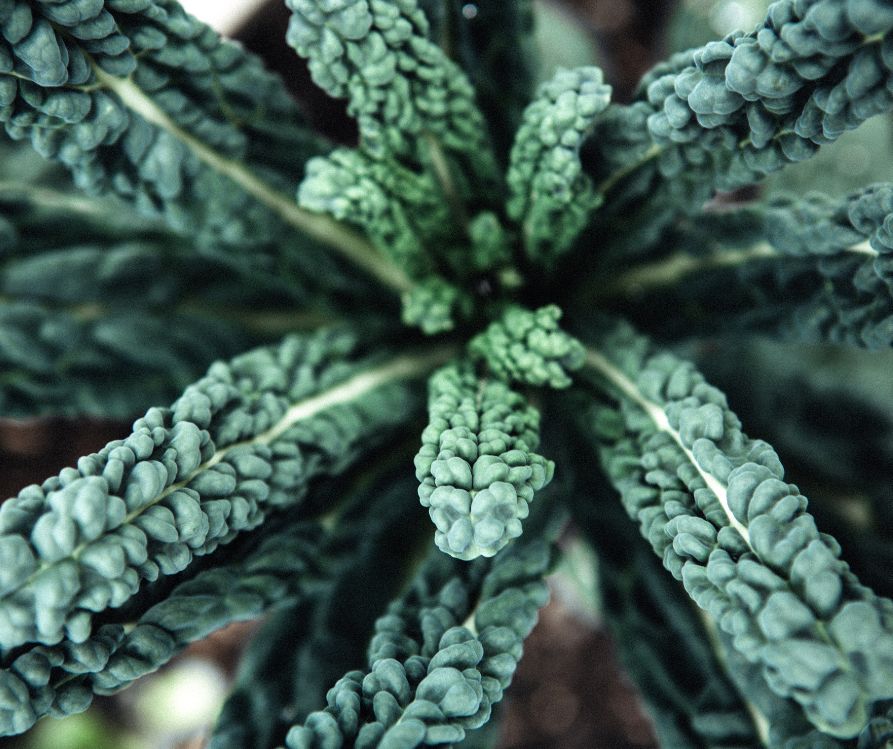
Winter Herb and Vegetable Bruschetta
Ingredients
- 1 French baguette, sliced
- 2 cups mixed winter vegetables (e.g., squash, kale, mushrooms), finely chopped
- 2 tbsp olive oil
- 2 cloves garlic, minced
- 1/4 cup fresh parsley, chopped
- 1/4 tsp red pepper flakes (optional)
- 1/2 cup shredded Parmesan cheese
- Salt and pepper to taste
Instructions
- Preheat the oven to 375°F (190°C).
- Arrange the baguette slices on a baking sheet and lightly brush each with olive oil. Toast in the oven for 5-7 minutes or until lightly golden. Remove and set aside.
- Heat 2 tablespoons of olive oil in a skillet over medium heat. Add the garlic and cook until fragrant, about 1 minute.
- Add the winter vegetables to the skillet and sauté for 5-7 minutes until tender. Season with salt, pepper, and red pepper flakes if desired.
- Remove the skillet from the heat and stir in fresh parsley.
- Spoon the vegetable mixture onto the toasted baguette slices. Sprinkle a small amount of Parmesan cheese on top of each.
- Return the bruschetta to the oven for 3-5 minutes, or until the cheese is melted and bubbly.
- Serve warm, garnished with additional parsley if desired.
Tip: Experiment with different vegetable combinations to make the most of your seasonal produce!
This elegant starter highlights hardy herbs that often survive light frosts. Combine finely diced stored beets, crisp apples from your orchard, and fresh sage or rosemary on toasted whole grain bread. A drizzle of homemade herb oil ties the flavors together while providing healthy fats that help nutrient absorption.
Stuffed Baby Bell Peppers with Quinoa
Ingredients:
- 12 baby bell peppers, halved and deseeded
- 1 cup cooked quinoa
- 1/2 cup black beans, rinsed and drained
- 1/2 cup corn kernels (fresh or frozen)
- 1/4 cup diced red onion
- 1/4 cup chopped fresh cilantro
- 1 tsp ground cumin
- 1/2 tsp smoked paprika
- 1/2 tsp garlic powder
- Salt and pepper, to taste
- 1/2 cup shredded cheese (optional)
- Olive oil spray
Instructions:
- Preheat oven to 375°F (190°C) and line a baking sheet with parchment paper.
- Arrange halved baby bell peppers, cut-side up, on the baking sheet and lightly spray them with olive oil.
- In a mixing bowl, combine the cooked quinoa, black beans, corn, red onion, cilantro, cumin, smoked paprika, garlic powder, salt, and pepper. Stir until well incorporated.
- Spoon the quinoa mixture into each halved pepper, filling generously.
- If desired, sprinkle shredded cheese on top of the stuffed peppers.
- Bake in the oven for 15–20 minutes, or until the peppers are tender and the filling is heated through.
- Remove from oven and serve warm. Garnish with additional chopped cilantro if preferred.
Tip: These stuffed peppers make a colorful appetizer or a light, wholesome meal. For a vegan option, skip the cheese or substitute with a plant-based alternative!**
If you stored bell peppers from your autumn harvest, these colorful bites make perfect party appetizers. Mix cooked quinoa with diced garden tomatoes you canned or froze, fresh herbs, and a splash of olive oil. The combination provides complete protein while showcasing your garden’s diversity.
Brussels Sprouts Chips with Garden Herb Dip
Ingredients
- 1 cup plain Greek yogurt (or a plant-based alternative)
- 1 tablespoon olive oil
- 1 tablespoon lemon juice
- 1 clove garlic, minced
- 2 tablespoons fresh parsley, finely chopped
- 1 tablespoon fresh dill, finely chopped
- 1 teaspoon fresh chives, finely chopped
- 1/2 teaspoon sea salt
- 1/4 teaspoon black pepper
Instructions
- Combine the Greek yogurt, olive oil, and lemon juice in a mixing bowl. Stir until smooth and creamy.
- Add the minced garlic, parsley, dill, chives, salt, and pepper. Mix thoroughly to incorporate all the ingredients.
- Taste and adjust the seasoning as necessary.
- Chill in the refrigerator for 20 minutes to enhance the flavors.
- Serve alongside crispy Brussels sprouts chips or fresh garden veggies.
Tip: Feel free to experiment with other fresh herbs from your garden for a personalized twist on this flavorful dip!**
Turn often-maligned Brussels sprouts into addictive appetizers by separating leaves and baking until crispy. Serve with a dip made from Greek yogurt mixed with your fresh chives, parsley, and garlic. These provide the satisfying crunch of traditional chips with significantly more nutrients and garden-fresh flavor.
Zucchini Noodles with Pesto
Ingredients:
- 4 medium zucchinis, spiralized
- 1 cup fresh basil leaves
- 1/4 cup pine nuts or walnuts
- 2 cloves garlic
- 1/2 cup grated Parmesan cheese
- 1/4 cup extra virgin olive oil
- Salt and pepper to taste
Instructions:
- Add basil, pine nuts, garlic, and Parmesan cheese to a food processor. Pulse until finely chopped.
- Gradually drizzle in olive oil while processing until the mixture reaches a smooth consistency.
- Season the pesto with salt and pepper to taste.
- Heat a large skillet over medium heat. Add the spiralized zucchini and sauté for 2-3 minutes, until tender but not mushy.
- Reduce heat to low and stir in the pesto sauce, ensuring the zucchini noodles are evenly coated.
- Serve immediately, optionally topped with additional Parmesan and fresh basil leaves.
Perfect for a light, healthy meal, this dish highlights your garden’s bounty with vibrant flavors and satisfying textures.**
Nourishing Main Courses Featuring Your Harvest
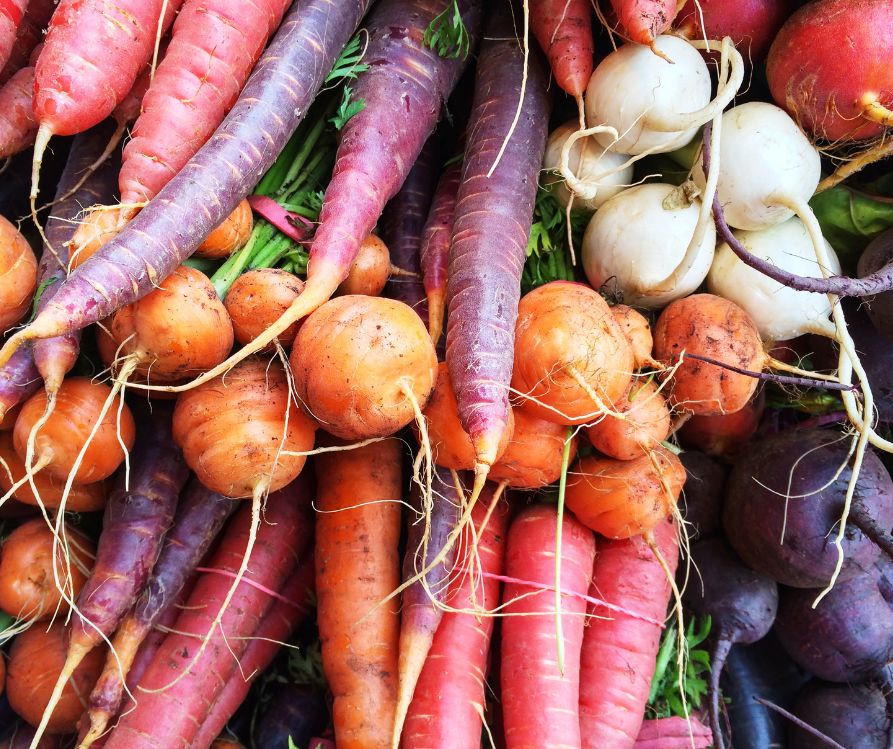
Herb-Crusted Salmon with Roasted Root Vegetables
Serves: 4
Prep Time: 15 minutes
Cook Time: 35 minutes
Ingredients:
- 4 salmon fillets (6 oz each)
- 2 tablespoons Dijon mustard
- 1 cup panko breadcrumbs
- 2 tablespoons fresh parsley, finely chopped
- 1 tablespoon fresh thyme leaves
- 1 teaspoon garlic powder
- 1/3 cup grated Parmesan cheese
- Salt and black pepper, to taste
- 1 pound carrots, peeled and cut into sticks
- 1 pound parsnips, peeled and cut into sticks
- 1 pound sweet potatoes, peeled and cubed
- 2 tablespoons olive oil
- 1 teaspoon smoked paprika
Instructions:
- Preheat your oven: Set to 400°F (200°C). Line a baking sheet with parchment paper.
- Prepare the veggies: Combine carrots, parsnips, and sweet potatoes in a large bowl. Drizzle with olive oil, sprinkle with smoked paprika, salt, and pepper, and toss until evenly coated. Spread the vegetables in an even layer on half of the prepared baking sheet.
- Season the salmon: Place the salmon fillets, skin side down, on the other half of the baking sheet. Spread a thin layer of Dijon mustard over each fillet.
- Make the herb crust: In a small bowl, mix panko breadcrumbs, parsley, thyme, garlic powder, Parmesan, salt, and pepper. Press the mixture onto the top of each salmon fillet, forming an even crust.
- Bake: Place the sheet in the oven and bake for 25-30 minutes, or until the vegetables are tender and the salmon is cooked through with a golden crust.
- Serve: Plate the salmon alongside the roasted vegetables and serve immediately for a wholesome, flavorful meal.
This recipe pairs perfectly with a light salad or a side of quinoa for a complete, nutrient-packed dinner.**
Center your Christmas dinner around omega-3 rich salmon, topped with a mixture of your preserved herbs, parsley, dill, and thyme work beautifully. Surround the fish with roasted parsnips, carrots, and beets from your storage cellar.
The natural sugars in roasted root vegetables caramelize during cooking, creating rich flavors that complement the herb-crusted fish perfectly.
This main course provides high-quality protein while showcasing the earthy, sweet flavors of winter vegetables. The colorful presentation makes an impressive centerpiece while supporting heart health and providing essential vitamins.
Stuffed Winter Squash with Wild Rice and Cranberries
Ingredients
- 2 medium-sized winter squash (e.g., acorn, butternut, or delicata)
- 1 cup wild rice, cooked
- 1/2 cup dried cranberries
- 1/3 cup chopped pecans or walnuts
- 1/4 cup diced onion
- 1 celery stalk, finely chopped
- 2 tablespoons olive oil
- 1 teaspoon dried sage
- 1/2 teaspoon ground cinnamon
- Salt and pepper to taste
- Optional: fresh parsley, chopped, for garnish
Instructions
- Prepare the squash: Preheat your oven to 375°F (190°C). Cut each winter squash in half lengthwise and scoop out the seeds. Brush the inside of the squash with 1 tablespoon of olive oil, and lightly season with salt and pepper. Place the squash halves cut-side down on a baking sheet lined with parchment paper. Roast for 25-30 minutes or until the flesh is tender.
- Make the stuffing: While the squash is roasting, heat the remaining tablespoon of olive oil in a skillet over medium heat. Sauté the onion and celery until softened, about 3-4 minutes. Stir in the cooked wild rice, dried cranberries, pecans or walnuts, dried sage, and ground cinnamon. Season with salt and pepper to taste.
- Stuff the squash: Remove the roasted squash from the oven and carefully flip them cut-side up. Fill each squash half generously with the wild rice mixture.
- Bake: Return the stuffed squash to the oven and bake for an additional 10-15 minutes, or until everything is heated through and slightly golden on top.
- Serve: Remove from the oven and garnish with fresh parsley, if desired. Serve warm as a flavorful, nutrient-packed main or side dish.
Enjoy the festive combination of sweet, savory, and nutty flavors!
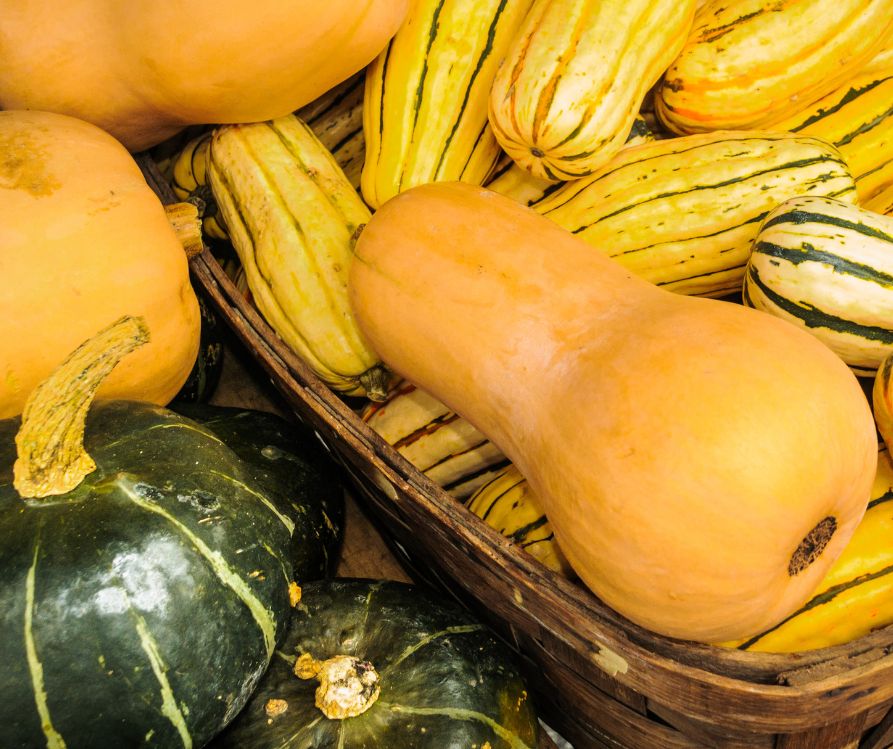
Large winter squash varieties like butternut or acorn make natural serving bowls for this festive vegetarian main course. Mix wild rice with dried cranberries, chopped walnuts, and diced garden vegetables like celery and onions. Fresh sage and thyme from your herb garden add aromatic complexity while complementing the squash’s natural sweetness.
Garden Vegetable and White Bean Stew
Ingredients:
- 2 tablespoons olive oil
- 1 medium onion, diced
- 3 garlic cloves, minced
- 2 carrots, peeled and sliced
- 2 celery stalks, chopped
- 1 zucchini, diced
- 1 cup green beans, trimmed and chopped
- 1 can (15 oz) diced tomatoes, with juice
- 4 cups vegetable broth
- 1 can (15 oz) white beans, drained and rinsed
- 1 teaspoon dried thyme
- 1 teaspoon dried oregano
- Salt and pepper to taste
- 2 cups fresh spinach or kale, chopped
- Fresh parsley, chopped (for garnish)
Instructions:
- Heat olive oil in a large pot over medium heat. Add the diced onion and sauté until translucent, about 5 minutes.
- Stir in the minced garlic, carrots, and celery. Cook for an additional 5 minutes until the vegetables begin to soften.
- Add the zucchini, green beans, diced tomatoes (with juice), and vegetable broth to the pot. Stir to combine.
- Bring the mixture to a gentle boil, then reduce heat to low and simmer uncovered for 15–20 minutes, or until the vegetables are tender.
- Stir in the white beans, thyme, oregano, salt, and pepper. Simmer for another 5 minutes to allow flavors to blend.
- Add the spinach or kale and cook until just wilted, about 2 minutes.
- Taste and adjust seasoning if necessary. Ladle into bowls, garnish with fresh parsley, and serve hot.
Perfect for cozy evenings, this hearty stew pairs wonderfully with crusty bread or a side salad.**
This hearty, warming dish celebrates the full spectrum of your preserved harvest. Combine white beans you grew and dried with canned or frozen garden tomatoes, stored onions, carrots, and celery. Fresh herbs added just before serving brighten the entire dish while providing satisfying protein and fiber that keeps guests feeling full without heaviness.
Vibrant Side Dishes from Your Garden Pantry
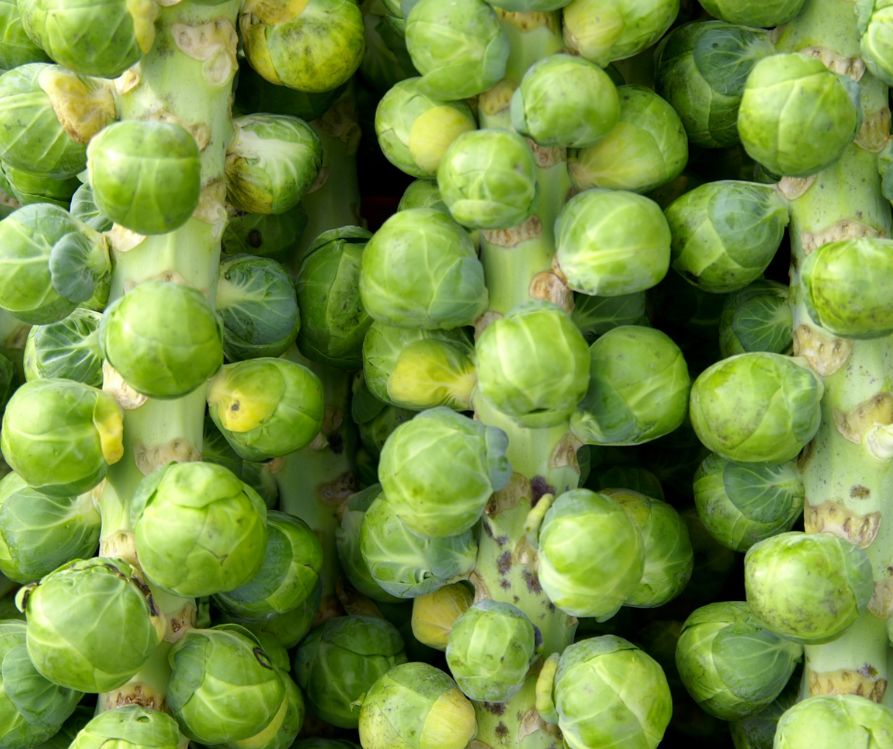
Maple Glazed Brussels Sprouts with Bacon and Apples
Ingredients
- 1 lb Brussels sprouts, trimmed and halved
- 4 slices of bacon, diced
- 1 medium apple, cored and diced (preferably a sweet variety like Honeycrisp)
- 2 tbsp olive oil
- 2 tbsp pure maple syrup
- 1 tbsp balsamic vinegar
- Salt and pepper, to taste
Instructions
- Preheat your oven to 400°F (200°C). Line a baking sheet with parchment paper or lightly grease it.
- Spread the trimmed and halved Brussels sprouts on the baking sheet. Drizzle with olive oil, and season with salt and pepper. Toss until evenly coated.
- Roast the Brussels sprouts in the oven for 15 minutes.
- While the Brussels sprouts are roasting, cook the diced bacon in a skillet over medium heat until crispy. Remove the bacon with a slotted spoon and set it aside on a paper towel-lined plate. Reserve about 1 tablespoon of bacon drippings in the skillet.
- Add the diced apple to the skillet and sauté in the bacon drippings for about 2-3 minutes until slightly softened.
- Remove the Brussels sprouts from the oven, add the cooked bacon and sautéed apple, and drizzle with maple syrup and balsamic vinegar. Toss everything together directly on the baking sheet.
- Return the baking sheet to the oven and roast for an additional 10 minutes, until the Brussels sprouts are caramelized and tender.
- Serve warm and enjoy this deliciously sweet and savory side dish!
Tip: For an extra crunch, sprinkle chopped pecans or walnuts over the dish before serving.**
Brussels sprouts often improve in flavor after light frosts, making them perfect for Christmas meals. Halve and roast them until edges are crispy, then toss with diced apples from your trees and a light maple glaze. Adding a small amount of bacon provides savory balance while the apples contribute natural sweetness and fiber.
Roasted Beet and Goat Cheese Salad
Serves 4 | Prep Time: 15 minutes | Cook Time: 45 minutes
Ingredients:
- 3 medium beets, washed and trimmed
- 2 cups mixed salad greens
- 1/3 cup crumbled goat cheese
- 1/4 cup chopped walnuts, toasted
- 2 tablespoons balsamic vinegar
- 1 tablespoon olive oil
- Salt and pepper to taste
Instructions:
- Preheat your oven to 400°F (200°C). Wrap the beets individually in aluminum foil and place them on a baking sheet. Roast for 40–45 minutes or until the beets are tender when pierced with a fork.
- Allow the beets to cool slightly, then peel off the skins using a paper towel or paring knife. Slice the beets into thin rounds or wedges.
- Arrange the mixed salad greens on a serving plate or bowl. Top with the sliced beets, crumbled goat cheese, and toasted walnuts.
- Drizzle the salad with balsamic vinegar and olive oil. Season with salt and pepper to taste.
- Gently toss or serve as-is for a beautiful presentation.
Tip: For an added burst of flavor, consider sprinkling the salad with fresh herbs like thyme or parsley.**
Your stored beets shine in this elegant side dish that adds color and sophistication to holiday tables. Roast mixed beet varieties until tender, then serve over fresh greens with crumbled goat cheese and toasted walnuts. A simple vinaigrette made with your herb-infused oil ties everything together while providing beneficial plant compounds.
Garlic and Herb Mashed Cauliflower
This creamy and flavorful mashed cauliflower is a delicious low-carb alternative to traditional mashed potatoes, perfect as a side dish for any meal.
Ingredients:
- 1 large head of cauliflower, cut into florets
- 2 tablespoons olive oil or unsalted butter
- 2 cloves garlic, minced
- 2 tablespoons fresh parsley, minced (plus extra for garnish)
- 1 teaspoon dried thyme
- 1/4 cup grated Parmesan cheese (optional)
- Salt and pepper to taste
Instructions:
- Bring a large pot of water to boil. Place cauliflower florets into the boiling water and cook for 8-10 minutes or until very tender. Drain and set aside.
- While the cauliflower is cooking, heat olive oil or butter in a small pan over medium heat. Add minced garlic and sauté for 1-2 minutes until fragrant.
- Transfer the drained cauliflower to a food processor or large mixing bowl. Add the sautéed garlic, parsley, thyme, and Parmesan cheese (if using). Blend or mash until smooth and creamy. Adjust consistency with additional olive oil or butter if needed.
- Season with salt and pepper to taste, then transfer to a serving bowl. Garnish with extra parsley for a fresh touch.
- Serve hot and enjoy!
Pro Tip: For an added depth of flavor, try roasting the cauliflower instead of boiling it!**
This lighter alternative to traditional mashed potatoes showcases cauliflower’s versatility while reducing the meal’s overall starch content. Steam cauliflower heads you stored in your root cellar, then mash with roasted garlic, fresh herbs, and a splash of olive oil or cream. The result provides creamy comfort with significantly more nutrients than traditional potatoes.
Braised Red Cabbage with Apples
Ingredients
- 1 medium head of red cabbage, thinly sliced
- 2 large apples, cored and thinly sliced
- 1 medium onion, thinly sliced
- 3 tbsp olive oil or butter
- 3 tbsp apple cider vinegar
- 2 tbsp brown sugar or honey
- 1/2 tsp ground cinnamon
- 1/4 tsp ground cloves (optional)
- Salt and pepper to taste
Instructions
- Heat the olive oil or butter in a large skillet or pot over medium heat.
- Add the sliced onion and cook until it becomes soft and translucent, about 5 minutes.
- Stir in the sliced cabbage and cook for another 5-7 minutes, stirring frequently, until the cabbage starts to wilt.
- Add the apple slices, apple cider vinegar, brown sugar, cinnamon, and ground cloves (if using). Mix well to combine.
- Reduce the heat to low, cover the skillet or pot, and allow the mixture to simmer for 20-25 minutes, stirring occasionally, until the cabbage is tender and the flavors meld together.
- Season with salt and pepper to taste, and adjust sweetness or acidity if needed.
- Serve warm as a vibrant side dish to complement roasted meats or hearty vegetarian mains.
This dish balances a perfect combination of savory and sweet, making it a crowd-pleaser for any meal!**
Red cabbage stores exceptionally well and becomes sweet and tender when braised slowly. Combine shredded cabbage with diced apples, onions, and a splash of apple cider vinegar. This traditional pairing provides probiotics, fiber, and natural sweetness while adding beautiful color to your holiday spread.
Guilt-Free Holiday Desserts Using Garden Fruits
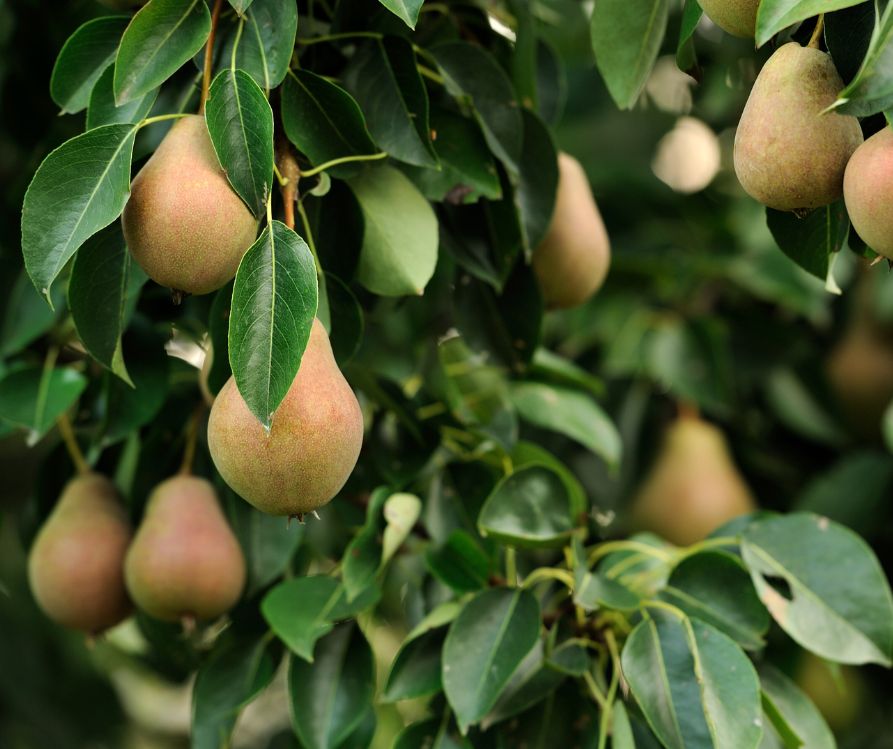
Spiced Pear Crisp with Oat Topping
Prep Time: 15 minutes
Cook Time: 40 minutes
Servings: 6
Ingredients:
- 4 ripe pears, cored and sliced
- 1 tsp ground cinnamon
- 1/4 tsp ground nutmeg
- 2 tbsp maple syrup
- 1 tsp lemon juice
For the topping:
- 1 cup rolled oats
- 1/3 cup almond flour
- 1/4 cup brown sugar or coconut sugar
- 1/4 cup melted butter or coconut oil
- 1/4 tsp salt
Instructions:
- Preheat oven to 350°F (175°C) and lightly grease a baking dish.
- Prepare the pear filling: Toss the pear slices in a bowl with cinnamon, nutmeg, maple syrup, and lemon juice until well coated. Layer evenly in the greased baking dish.
- Make the topping: Combine rolled oats, almond flour, sugar, melted butter, and salt in a separate bowl. Mix until the ingredients form a crumbly texture.
- Assemble: Evenly sprinkle the topping mixture over the pear filling in the baking dish.
- Bake: Place in the preheated oven and bake for 35-40 minutes, or until the topping is golden brown and the pears are tender.
- Serve: Allow to cool slightly before serving with vanilla ice cream or whipped cream for an extra treat!
Enjoy this warm, spiced dessert as a lighter alternative to traditional holiday sweets!**
Pears from your trees create the perfect base for this wholesome dessert that satisfies sweet cravings without excessive sugar. Combine sliced pears with cinnamon, nutmeg, and a touch of honey, then top with a mixture of oats, nuts, and a small amount of butter. The natural fruit sugars provide sweetness while the oat topping adds satisfying texture and fiber.
Apple Cinnamon Chia Pudding
Ingredients:
- 1 cup unsweetened almond milk (or milk of choice)
- 3 tablespoons chia seeds
- 1 small apple, finely diced
- 1/2 teaspoon ground cinnamon
- 1 teaspoon pure maple syrup (optional, to taste)
Instructions:
- In a medium bowl or jar, combine the almond milk, chia seeds, ground cinnamon, and maple syrup (if using). Stir well to ensure the chia seeds are evenly distributed.
- Add the finely diced apple to the mixture and gently stir again.
- Cover and refrigerate for at least 4 hours or overnight, allowing the chia seeds to absorb the liquid and form a pudding-like consistency.
- Before serving, give the pudding a good stir and spoon it into bowls or jars. Top with a few extra apple pieces or a sprinkle of cinnamon if desired.
- Serve chilled and enjoy a healthy, flavorful breakfast or snack! **
This make-ahead dessert transforms simple ingredients into something special. Combine chia seeds with almond milk, diced apples from your orchard, cinnamon, and a touch of maple syrup. The chia seeds provide omega-3 fatty acids and protein while creating a pudding-like texture that feels indulgent but supports healthy eating goals.
Cranberry Orange Quinoa Cookies
Ingredients
- 1 cup cooked quinoa
- 1 cup rolled oats
- 1/2 cup dried cranberries
- Zest of 1 orange
- 1/4 cup orange juice
- 1/4 cup honey or maple syrup
- 1/4 cup coconut oil, melted
- 1/2 teaspoon vanilla extract
- 1/2 teaspoon baking powder
- 1/4 teaspoon salt
Instructions
- Preheat your oven to 350°F (175°C) and line a baking sheet with parchment paper.
- Combine the cooked quinoa, rolled oats, and dried cranberries in a large mixing bowl.
- Add the orange zest, orange juice, honey or maple syrup, melted coconut oil, and vanilla extract to the bowl. Mix well.
- Sprinkle in the baking powder and salt, ensuring everything is evenly incorporated.
- Scoop out tablespoon-sized portions of the mixture and shape into cookies. Place them on the prepared baking sheet, leaving a little space between each.
- Bake for 10-12 minutes, or until the edges turn golden brown.
- Allow the cookies to cool on the baking sheet for a few minutes before transferring them to a wire rack to cool completely.
Notes
- These cookies are naturally sweetened and packed with fiber and protein, making them a wholesome snack or breakfast option.
- For extra crunch, fold in a handful of chopped nuts or seeds.
- Store in an airtight container at room temperature for up to 5 days. **
These protein-rich cookies incorporate quinoa flour for added nutrition while maintaining traditional cookie appeal. Mix dried cranberries from your bog or store-bought ones with orange zest, creating familiar holiday flavors in a healthier package. The quinoa provides complete protein while whole grain flours add fiber and complex carbohydrates.
Festive Garden Herb Beverages
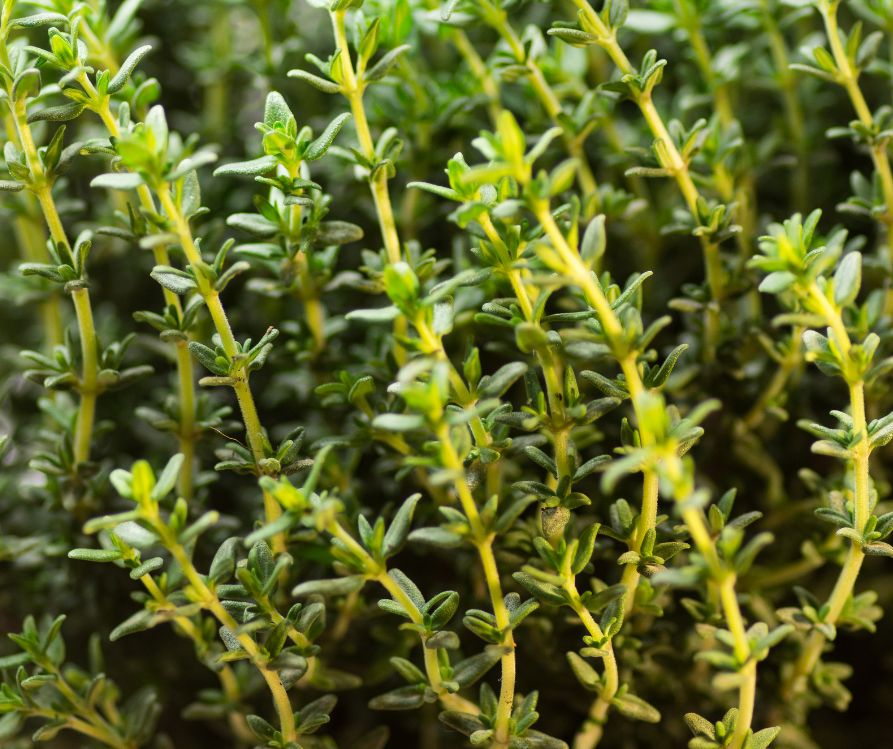
Lemon-Thyme Sparkling Refresher
Ingredients:
- 1 liter sparkling water
- 2 lemons, thinly sliced
- 4-5 sprigs of fresh thyme
- 1 tablespoon honey or natural sweetener (optional)
- Ice cubes
Instructions:
- Fill a large pitcher with sparkling water.
- Add the lemon slices and fresh thyme sprigs to the pitcher.
- If desired, stir in the honey or sweetener to taste.
- Allow the mixture to chill in the refrigerator for 30 minutes to an hour for the flavors to infuse.
- Serve over ice and garnish with additional thyme sprigs or lemon slices, if desired. **
Even in winter, mint often survives in protected areas or can be grown indoors. Combine fresh mint leaves with cucumber slices in pitchers of water for a refreshing, detoxifying beverage that cleanses the palate between rich holiday dishes. This alcohol-free option keeps everyone hydrated while providing subtle, sophisticated flavor.
Rosemary Cranberry Mocktail
Ingredients
- 1 cup cranberry juice
- 1/2 cup sparkling water
- 1 tablespoon fresh lime juice
- 1 rosemary sprig (plus extra for garnish)
- 1/4 cup fresh cranberries (optional, for garnish)
- Ice cubes
Instructions
- Gently muddle the rosemary sprig in a glass or shaker to release its aromas.
- Add the cranberry juice and lime juice to the shaker, and mix well with the muddled rosemary.
- Fill a serving glass halfway with ice cubes.
- Strain the juice mixture into the glass and top with sparkling water.
- Stir gently to combine.
- Garnish with a fresh rosemary sprig and a few fresh cranberries, if desired.
This festive, alcohol-free beverage pairs perfectly with holiday gatherings, offering herbal and fruity notes for a sophisticated refreshment. Enjoy! **
Create festive drinks using rosemary simple syrup made with fresh herbs from your garden. Combine with cranberry juice and sparkling water for a beautiful red beverage that captures the holiday spirit without alcohol. The rosemary provides antioxidants while the cranberries support urinary health.
Warm Apple Cider with Garden Herbs
Ingredients
- 4 cups apple cider
- 2 cinnamon sticks
- 4 whole cloves
- 2 sprigs fresh rosemary
- 1 sprig fresh thyme
- 1 small orange (sliced)
- 1 tablespoon honey (optional, to taste)
Instructions
- Combine apple cider, cinnamon sticks, cloves, rosemary, thyme, and orange slices in a medium saucepan.
- Heat the mixture over medium heat until it starts to simmer, then reduce the heat to low.
- Allow the cider to simmer gently for 10–15 minutes, stirring occasionally to infuse the flavors.
- Taste and add honey if desired for additional sweetness.
- Strain the cider to remove herbs and spices, then serve warm in mugs.
- Garnish with fresh rosemary or a cinnamon stick for an extra festive touch.
Enjoy this cozy drink, perfect for chilly evenings or holiday gatherings!**
Heat apple cider from your pressed apples with fresh thyme, sage, or rosemary for a warming beverage that showcases your harvest. These herbs add complexity and provide additional antioxidants while creating aromatic steam that fills your kitchen with holiday scents.
Making Your Garden Christmas Menu Work

Planning a garden-based holiday menu requires some advance thinking, but the results justify the effort.
Start by inventorying your stored vegetables, preserved herbs, and any fresh growth still available in your garden.
Winter herbs like rosemary, thyme, and sage often remain accessible even in cold weather, while root vegetables stored properly can last through the entire winter season.
Consider which dishes can be prepared partially in advance using your preserved ingredients.
Many vegetable-based side dishes actually improve in flavor when made a day ahead, allowing you to focus on fresh preparations on Christmas Day.
Your canned tomatoes, frozen herbs, and dried beans can form the foundation of several dishes, reducing last-minute preparation stress.
Don’t forget about the presentation. Your homegrown ingredients deserve to be showcased beautifully.
Simple garnishes using fresh herbs or colorful vegetables make even simple food recipes look restaurant-quality. Your guests will appreciate both the visual appeal and the story behind the ingredients you grew yourself.
Creating New Holiday Traditions with Your Harvest
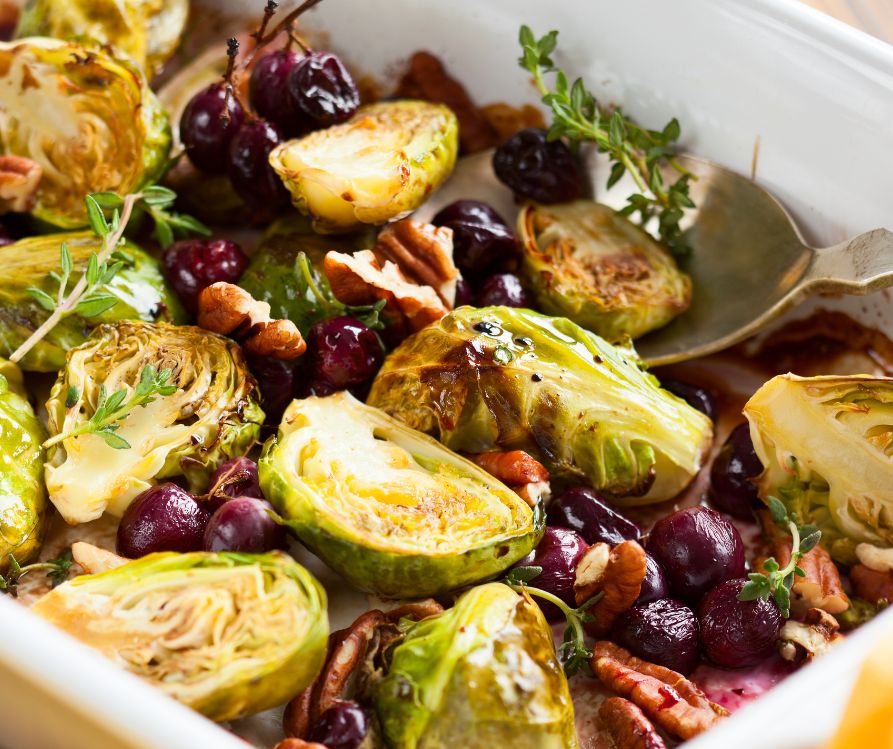
Incorporating your garden’s bounty into Christmas celebrations creates opportunities for new family traditions that connect loved ones to the food they’re eating.
Consider involving family members in simple preparation tasks like washing vegetables, snipping herbs, or arranging garnishes.
These activities create meaningful memories while teaching appreciation for homegrown food.
Your garden-to-table Christmas menu becomes a conversation starter that allows you to share your gardening experiences and inspire others to grow their own food.
Many guests leave these meals motivated to start their own gardens, extending your influence beyond a single meal into lasting lifestyle changes.
Document your successful combinations of garden ingredients and food recipes so you can repeat and refine them in future years.
Photos of particularly beautiful dishes or notes about which herbs paired best with specific vegetables become valuable references for future holiday planning.
The satisfaction of serving a meal created primarily from your own efforts, from seed to plate, transforms Christmas dinner from mere consumption into a celebration of self-sufficiency and connection to natural cycles. This deeper meaning elevates the entire dining experience for everyone at your table.
Embracing Healthy Holiday Abundance

Creating Christmas food ideas centered around your garden’s harvest proves that healthy eating doesn’t require sacrifice during holiday celebrations.
Instead, it enhances the experience by adding layers of meaning, flavor, and satisfaction that conventional holiday meals often lack.
Your guests taste the difference that fresh, carefully tended ingredients make while enjoying the visual beauty of colorful, varied dishes.
This approach to holiday cooking also demonstrates that yummy food and nutritious food aren’t mutually exclusive concepts.
When vegetables are grown with care and prepared thoughtfully, they provide both pleasure and nourishment. Your Christmas table becomes a showcase for the idea that the most delicious meals often happen to be the healthiest ones.
Start planning your garden-harvest Christmas menu today by reviewing what ingredients you have available and imagining how they might combine in creative food recipes.
Remember that simple preparations often highlight your homegrown ingredients most effectively. Let their natural flavors shine through with minimal but thoughtful seasoning and cooking methods.
Your garden has provided an abundance throughout the growing season. Now let it provide the foundation for a Christmas celebration that nourishes both body and spirit while creating lasting memories around your family table.
Visit the Garden Resources page for supplies and inspiration. Don’t forget to subscribe to the Calendula’s Garden Newsletter for more gardening tips.
Calendula’s Garden is reader supported. When you buy through links on our site, we may earn an affiliate commission. As an Amazon Associate, I earn from qualifying purchases. For more information, view our Disclaimer page. Thank you!