Create an Enchanting World with These Budget Friendly DIY Fairy Garden Ideas
Calendula's Garden is reader suported This post may contain affiliate links, more on our Disclaimer page. Thank you!
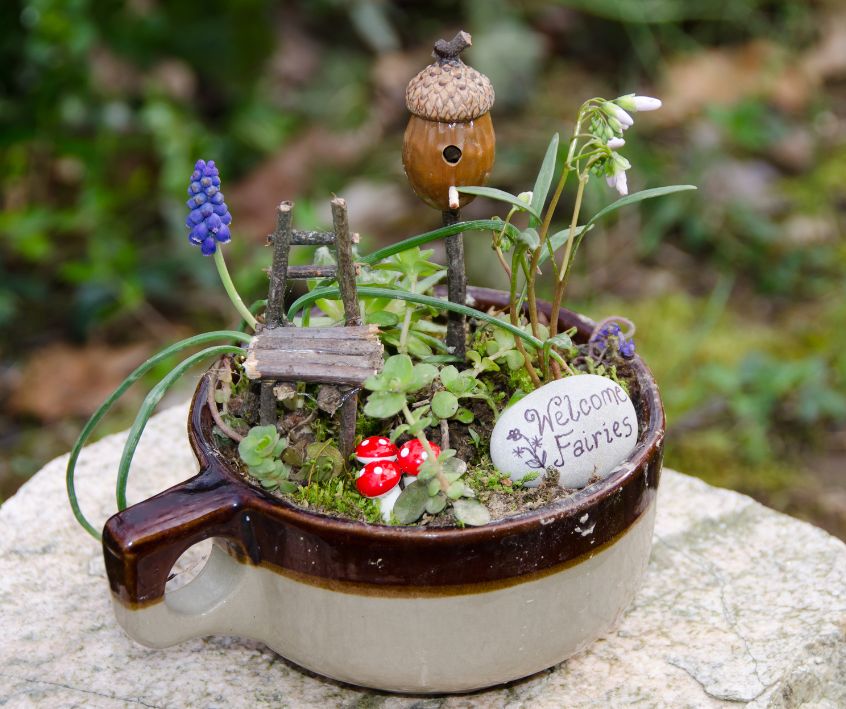
Fairy gardens are lovely, whimsical bursts of creativity. These miniature landscapes, complete with tiny houses, diminutive plants, and whimsical accessories, have a way of capturing the imagination of both the young and the young at heart.
Whether tucked away in a quiet corner of a flower bed or displayed prominently in a container on the patio, a fairy garden invites us to pause, look closer, and believe in a little bit of magic.
Beyond their whimsical appeal, fairy gardens offer a unique way to connect with nature on a manageable scale. For those of us with limited space or time, they provide all the joys of gardening, designing, planting, and nurturing, without the demands of a full-sized plot.
They are also a fantastic entry point for beginners, allowing you to experiment with plant combinations and design elements in a low-risk environment.
Perhaps the best part is that creating an enchanted forest doesn’t require a pot of gold. In fact, some of the most charming fairy gardens are born from creativity and resourcefulness rather than expensive store-bought items.
By repurposing materials, propagating plants, and crafting your own accessories, you can build a stunning miniature world that is as kind to your wallet as it is to the earth. Let’s explore how you can cultivate your own slice of magic on a budget.
Understanding the Basics of Fairy Gardening
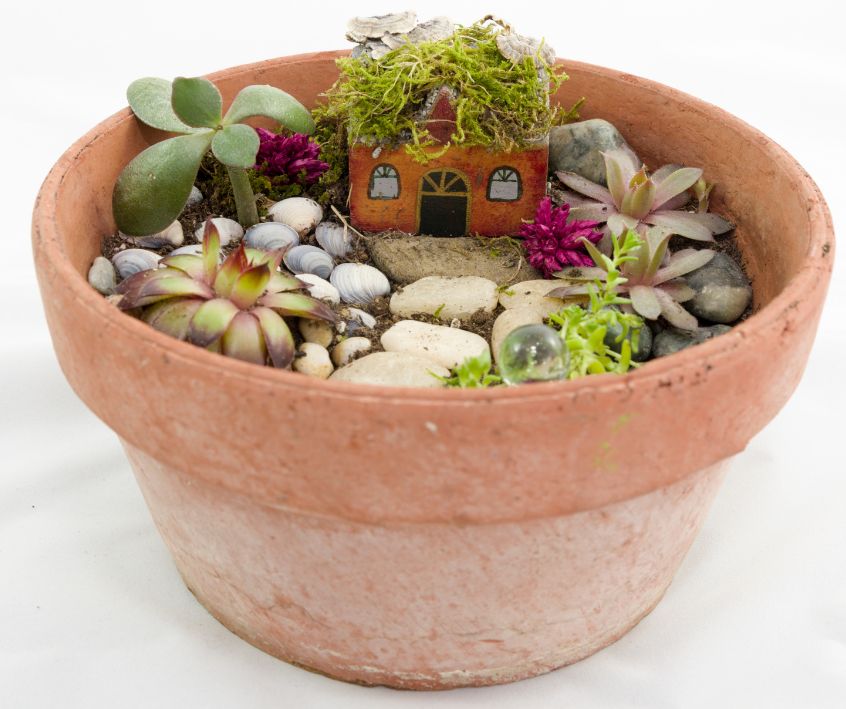
Before diving into the soil, it helps to understand the core components that make up a successful fairy garden.
At its heart, this is simply container gardening with a storytelling twist. You are creating a living diorama, a habitat for imaginary creatures that needs to function biologically as well as aesthetically.
The four pillars of any fairy garden are the container, the substrate (soil), the plants, and the accessories. When you are working on a budget, the key is to invest where it matters, usually the soil and plants, and get creative with the rest.
The Foundation: Soil
Don’t be tempted to dig up dirt from your backyard for a container garden. Garden soil is often too heavy and can compact in a pot, suffocating delicate roots.
It may also harbor pests or diseases. Instead, use a high-quality potting mix. It provides the drainage and aeration your miniature plants need to thrive.
To save money, buy a larger bag of potting mix rather than small, specialized bags; you can store the excess for future projects or share it with a friend.
The Narrative: Theme and Scale
Decide on a loose theme before you start gathering materials. Is this a woodland retreat? A beachside cottage? A desert oasis? Your theme will guide your choices for plants and accessories, preventing impulse buys that don’t fit the vibe.
Scale is also crucial. A common mistake is mixing items of vastly different sizes, like a house that is smaller than the chair next to it. Keep your scale consistent (usually 1:12 or 1:24) to maintain the illusion of a real, tiny world.
Thrifty Container Ideas
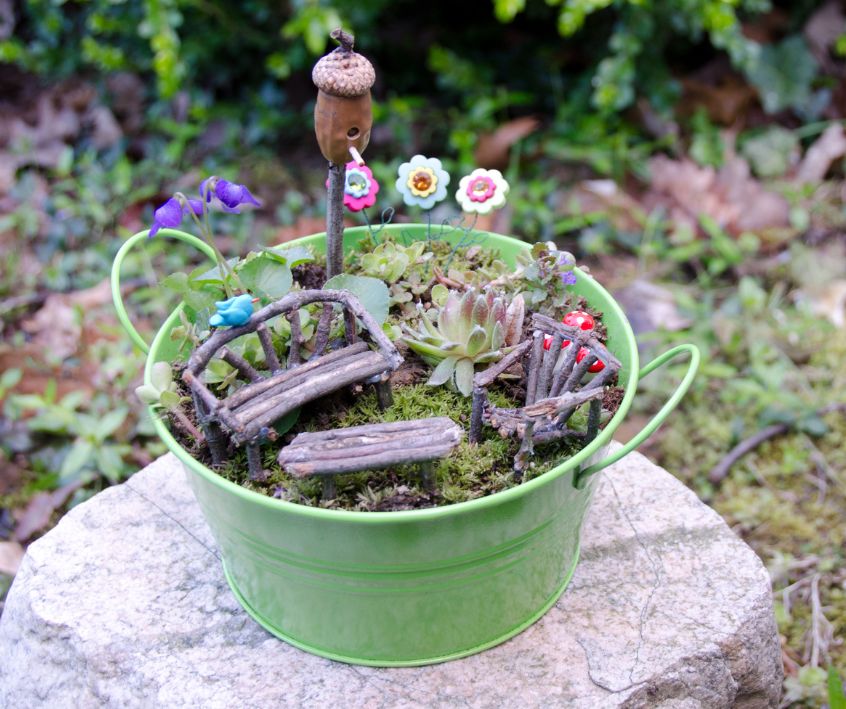
The vessel for your fairy garden sets the stage for the entire scene. While garden centers offer beautiful, specialized shallow planters, they often come with a hefty price tag. Fortunately, almost anything that can hold soil and drain water can become a home for your fairies.
Repurposed Pots and Planters
Look around your shed or garage. That cracked terracotta pot? It’s perfect. You can arrange the broken shards (carefully!) to create a tiered landscape or a winding staircase leading up to a fairy door.
Old galvanized washtubs, colanders, or even a rusted wheelbarrow can add rustic charm and ample space for a sprawling village.
Upcycled Household Items
Think outside the garden shed. An old wooden crate or a deep drawer from a discarded dresser can make a fantastic rectangular planter.
Just be sure to line wooden items with plastic (poking holes for drainage) to prevent rot. Teacups make adorable homes for single-plant micro-gardens, while an old birdbath can lift your fairy garden to eye level, making it a focal point in the yard.
Preparing Your Container
Regardless of what you choose, drainage is non-negotiable. If your container doesn’t have holes, you must drill them.
If drilling isn’t an option (like with a vintage ceramic bowl), you can create a drainage layer at the bottom using gravel and activated charcoal, though this is riskier for long-term plant health. For most DIY vessels, a few holes and a layer of coffee filters over them (to keep the soil in) works wonders.
Selecting Budget-Friendly Plants
The plants are the “forest” in your enchanted forest. You want species that stay small or grow slowly, mimicking the look of full-sized trees and shrubs. Buying mature miniature plants can get pricey, but there are smart ways to populate your garden for less.
Where to find seeds, plants, and supplies:
Ground Cover
Ground covers act as the “lawn” or meadow of your fairy garden.
- Irish Moss (Sagina subulata): Creates a lush, emerald-green carpet that looks exactly like miniature grass.
- Creeping Thyme (Thymus serpyllum): Smells wonderful when brushed against and produces tiny flowers.
- Baby’s Tears (Soleirolia soleirolii): Features distinct, tiny, round leaves that create a dense mat.
Miniature Trees and Shrubs
To create height and perspective, you need vertical elements.
- Dwarf Conifers: Look for “dwarf” or “slow-growing” varieties in the nursery’s clearance section. Even a small boxwood or juniper seedling can look like a towering ancient tree in a fairy garden.
- Rosemary: A small rosemary plant can be pruned to look like a pine tree. Plus, it’s a hardy herb that smells divine. Bonnie Plants Rosemary Live Edible Aromatic Herb Plant
- Polka Dot Plant (Hypoestes phyllostachya): Adds splashes of pink, red, or white, adding color without relying on flowers.
Propagation for Savings
The absolute cheapest way to get plants is to grow them yourself. Many suitable fairy garden plants, especially succulents (like sedum and hens-and-chicks), propagate incredibly easily.
Simply snipping a leaf or stem from a friend’s plant (with permission!) or dividing a larger plant you already own can provide you with limitless greenery for free. Succulents are particularly good for fairy gardens because they are drought-tolerant and slow-growing, meaning less maintenance for you.
Crafting Your Own Fairy Accessories
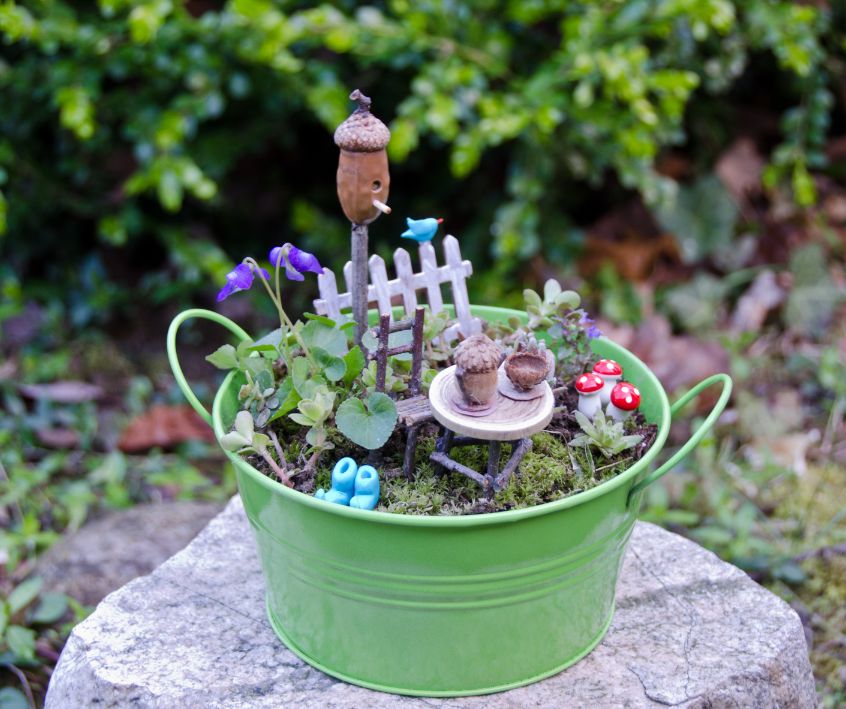
This is where the magic and the savings really happen. Store-bought fairy accessories can be shockingly expensive. Handcrafting your own allows for customization and utilizes natural materials found right in your backyard or local park.
The Fairy House
You don’t need to buy a resin house. Build a custom abode using a clean, empty milk carton or a plastic bottle as the base.
- The Structure: Cut out a door and windows from your base.
- The Facade: Cover the exterior with air-dry clay or hot glue.
- The Texture: While the clay or glue is wet/tacky, press in natural materials. Use dried bark for siding, small pebbles for a stone cottage look, or pinecone scales for roof shingles.
- The Details: Use a larger twig for a chimney and a small seed pod for a doorknob.
Mini Hot Glue Gun Kit with 30 Glue Sticks
Furniture and Pathways
Furniture
Twigs are your best friend here. Use pruning shears to cut twigs to size and hot glue them together to make rustic benches, chairs, and tables.
Bottle caps can serve as tabletops or stepping stones. Champagne corks can be carved into toadstools, just paint the top red with white polka dots!
Pathways
A path invites the eye to travel through the garden. Use aquarium gravel (cheap and colorful), small river stones, or even broken seashells to create winding roads. Sand creates a lovely beachy path, while dried crushed leaves look like a forest floor.
Water Features
Every enchanted forest needs a babbling brook or a pond. You can make a realistic-looking water feature using a small mirror.
Buried flush with the soil and surrounded by pebbles and moss to hide the edges, it reflects the sky and plants, mimicking still water perfectly. Alternatively, paint the inside of a jar lid blue and fill it with clear resin or just blue glass gems for a sparkly effect.
Layout and Design Principles
Designing a miniature landscape requires the same principles as full-scale landscape architecture, just shrunk down.
- Focal Points: Decide where you want the viewer to look first. Usually, this is the fairy house. Place it slightly off-center for a more natural look (the rule of thirds works well here).
- Layers: build your garden from the ground up. Start with your hardscape (house, paths, large rocks), then add your largest plants (trees), followed by medium shrubs, and finally ground covers. This creates depth.
- Negative Space: Don’t overcrowd the container. Leave some open space. Perhaps a mossy clearing or a gravel patio. This prevents the garden from looking cluttered and gives the fairies “room” to dance.
- Perspective: Place larger plants and rocks toward the front and smaller ones toward the back to create a forced perspective, making the garden appear deeper than it actually is.
Maintenance Tips for a Thriving World
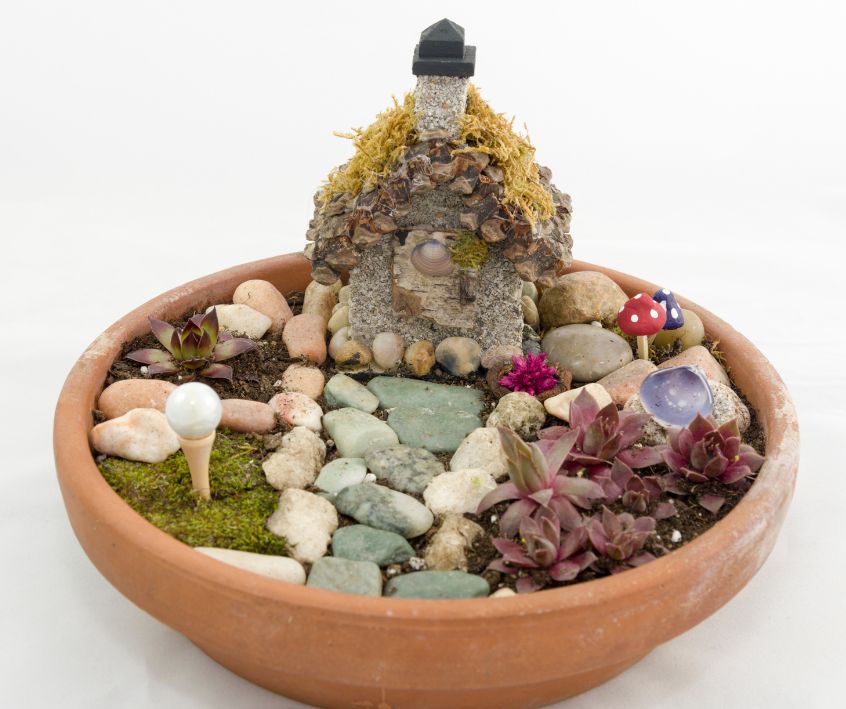
A fairy garden is a living ecosystem that requires care. Because the volume of soil is small, these gardens can dry out faster than large pots.
Watering
Water gently. A heavy stream from a hose can wash away your gravel paths and knock over your furniture. Use a small watering can with a rosette (sprinkler) tip or a squeeze bottle to direct water specifically to the base of the plants, avoiding the accessories.
If you have succulents, let the soil dry out completely between waterings. For tropicals and ferns, keep the soil consistently moist.
Pruning and Trimming
In a miniature world, an overgrown plant is a monster. Regular pruning is essential to keep the scale believable.
Snip back ground covers if they start creeping over pathways. Pinch off the tips of your “trees” (like rosemary or boxwood) to encourage bushier growth and maintain their tree-like shape.
Fertilizing
Since you want these plants to stay small, go easy on the fertilizer. Over-fertilizing will lead to rapid growth, which defeats the purpose. A diluted, organic liquid fertilizer applied once in the spring is usually sufficient to keep plants healthy without fueling a growth spurt.
Troubleshooting
- Pests: Keep an eye out for aphids or spider mites. If you spot them, a gentle spray of insecticidal soap or neem oil usually does the trick.
- Mold/Algae: If you see green algae on the soil surface or glass accessories, it usually means the garden is too wet. Reduce watering and improve air circulation.
Adapting for the Seasons
One of the joys of a fairy garden is that it can evolve. Seasonal updates keep the garden fresh and exciting.
- Spring: Add tiny faux eggs to nests or plant miniature flowering bulbs like crocus.
- Summer: Add a “beach” area with sand and a tiny umbrella made from a cocktail pick.
- Autumn: This is the perfect time for tiny pumpkins (you can make these from orange clay or buy dried putka pods that look exactly like mini pumpkins). Scattered dried leaves add realism. Mini Orange Putka Pods
- Winter: If you live in a cold climate, you might need to bring your garden indoors or choose hardy evergreens. You can dust the plants with flour for a temporary “snow” effect for photos, or add white gravel. Tiny LED string lights can add a cozy, festive glow during the darker months. 12 Pack Fairy Lights Battery Operated String Lights
A Project for the Whole Family
Fairy gardening is a fantastic way to introduce children to the world of horticulture. It fosters creativity, fine motor skills, and a sense of responsibility.
Kids are natural scavengers. Send them on a mission to find “building materials” like acorns, interesting rocks, or feathers. Let them design the layout. Children often have the best imaginations for where a fairy might like to hide or sleep.
This shared activity can spark conversations about plant life cycles, ecosystems, and the importance of caring for living things. Plus, the low stakes and “toy-like” nature of the accessories make gardening feel like play rather than a chore.
Start Your Adventure Today
Creating a DIY fairy garden doesn’t require a degree in landscape design or a hefty budget. It simply requires a little curiosity and a willingness to see the potential in ordinary objects.
By repurposing containers, choosing affordable or propagated plants, and hand-crafting your accessories, you can build a magical retreat that brings joy every time you pass by.
So, grab an old pot, take a walk outside to gather some twigs, and start building. You might be surprised at just how enchanting a budget-friendly project can be.
Do you have a fairy garden story or a clever budget hack we missed? We’d love to see your miniature creations! Share your photos with us on social media and tag us to join our growing community of magical gardeners. Happy gardening!
Visit the Garden Resources page for supplies and inspiration. Don’t forget to subscribe to the Calendula’s Garden Newsletter for more gardening tips.
Calendula’s Garden is reader supported. When you buy through links on our site, we may earn an affiliate commission. As an Amazon Associate, I earn from qualifying purchases. For more information, view our Disclaimer page. Thank you!